

Setup guide
Dodo Payments
Payments
Review supported Dodo Payments records before importing revenue data.
What it does
Connect Dodo Payments with a read-only API key to inspect supported successful customer payments. You approve each suggestion before RunwayCal creates a receipt or a deal-and-receipt pair.
Prerequisites
- A Dodo Payments merchant account
- Access to your Dodo API key
Step-by-step setup
1
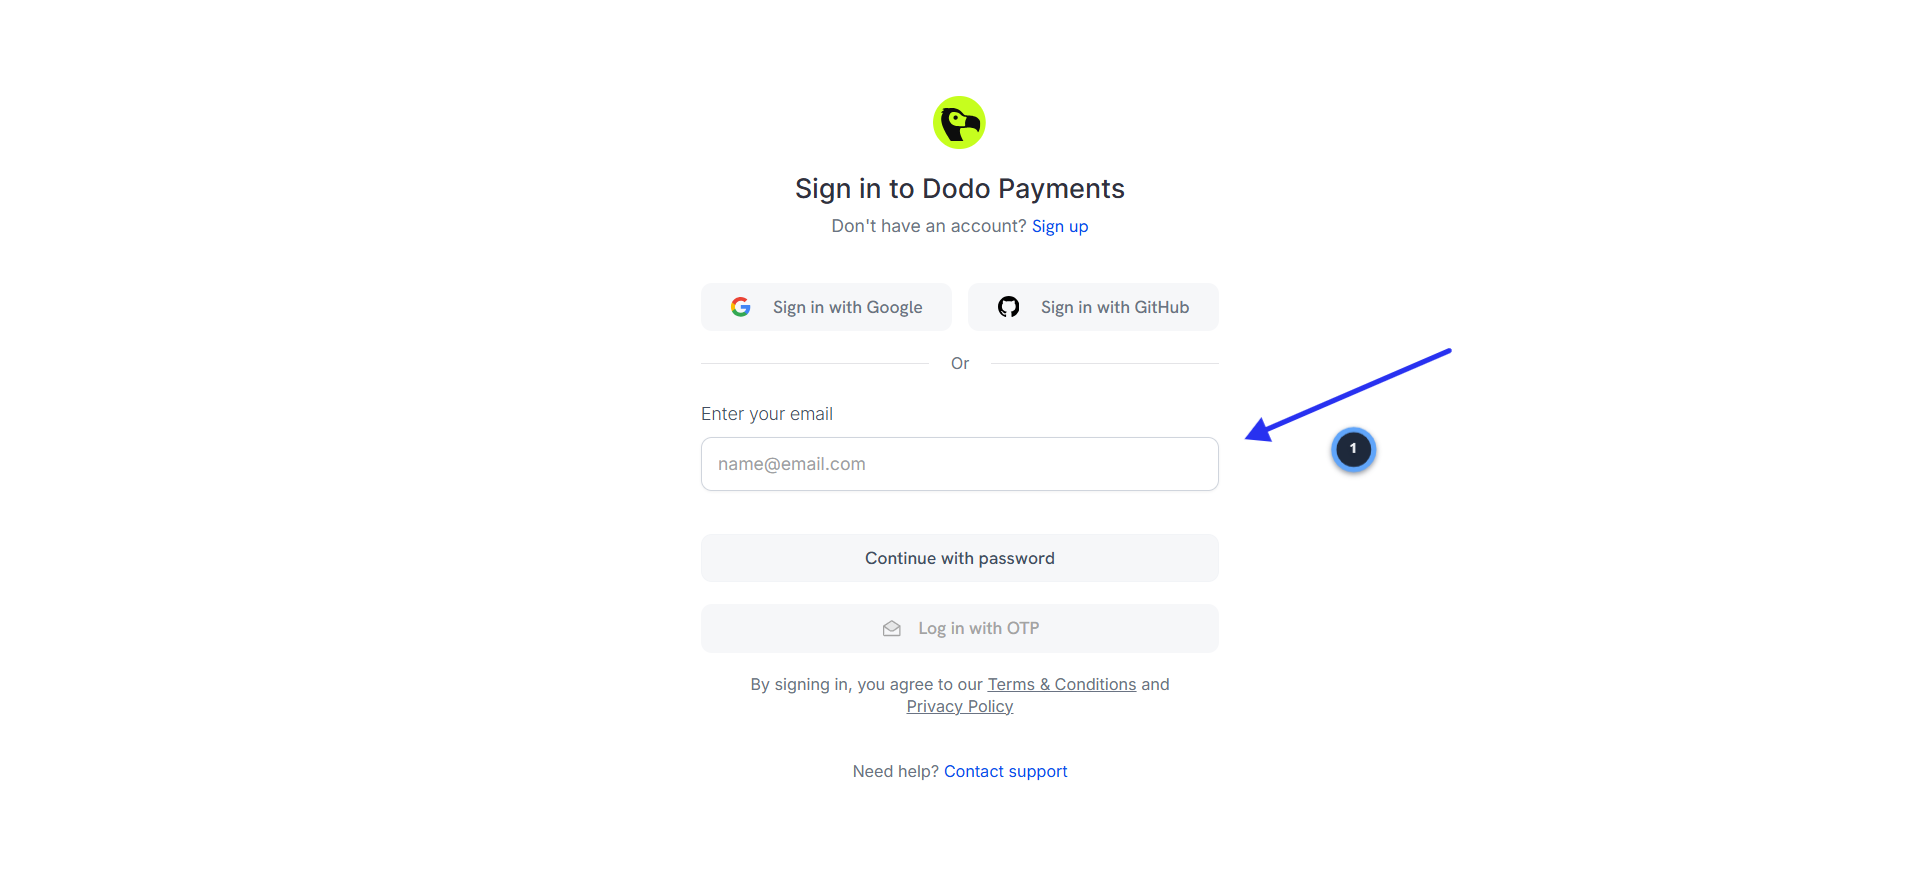
Log in to Dodo Payments
- 1.Go to app.dodopayments.com
- 2.Sign in with Google, GitHub, or your email and password
2
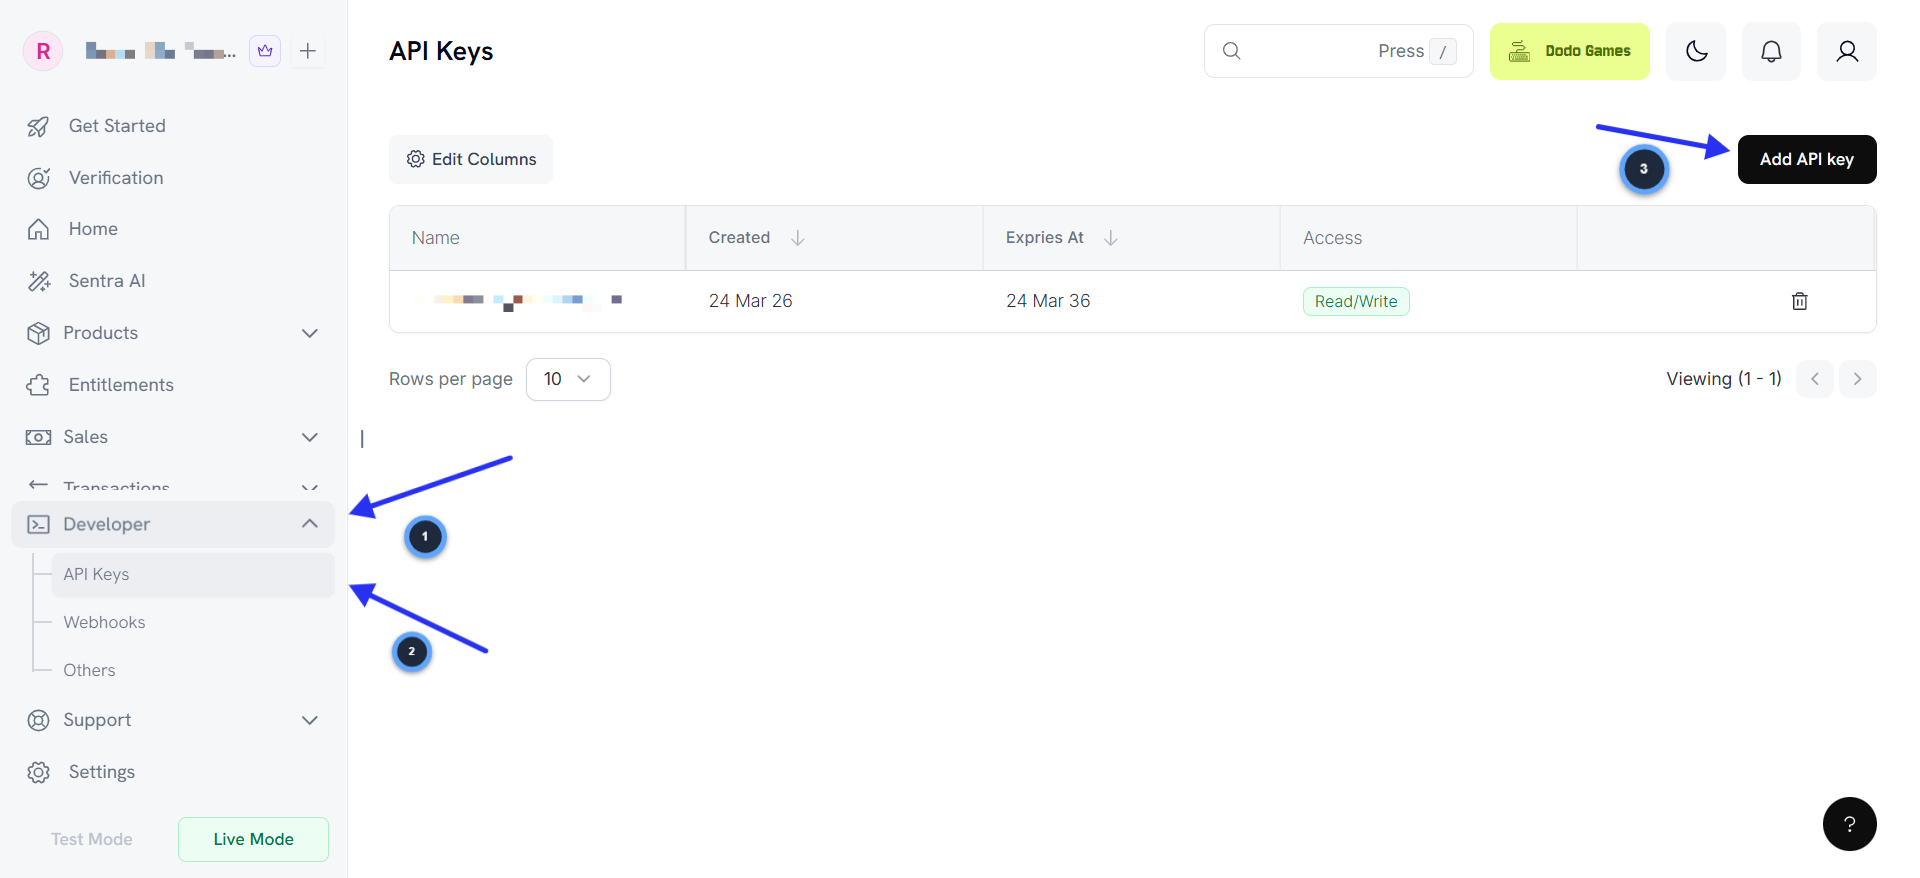
Navigate to API Keys
- 1.In the left sidebar, click "Developer" to expand it
- 2.Click "API Keys"
- 3.Click "Add API key" in the top-right corner
3
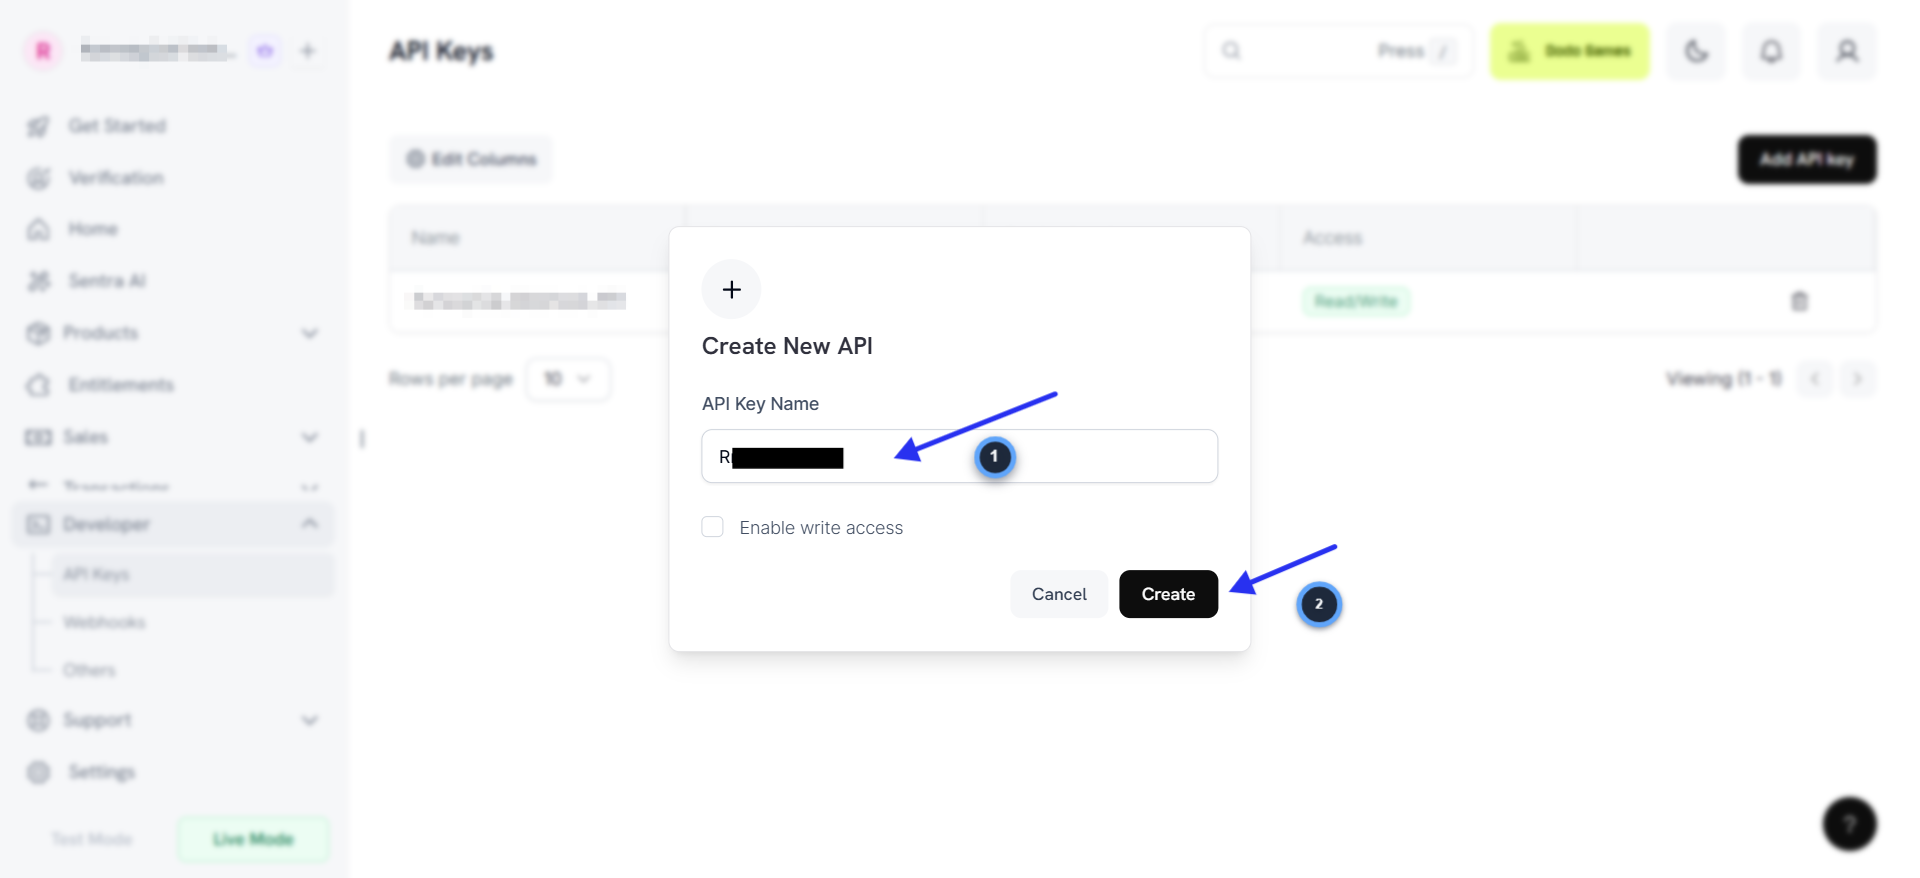
Create a new API key
- 1.In the "Create New API" modal, enter API Key Name: "RunwayCal"
- 2.Leave "Enable write access" unchecked. RunwayCal only needs read access.
- 3.Click "Create"
- 4.Copy the API key immediately. You may not be able to see it again.
4
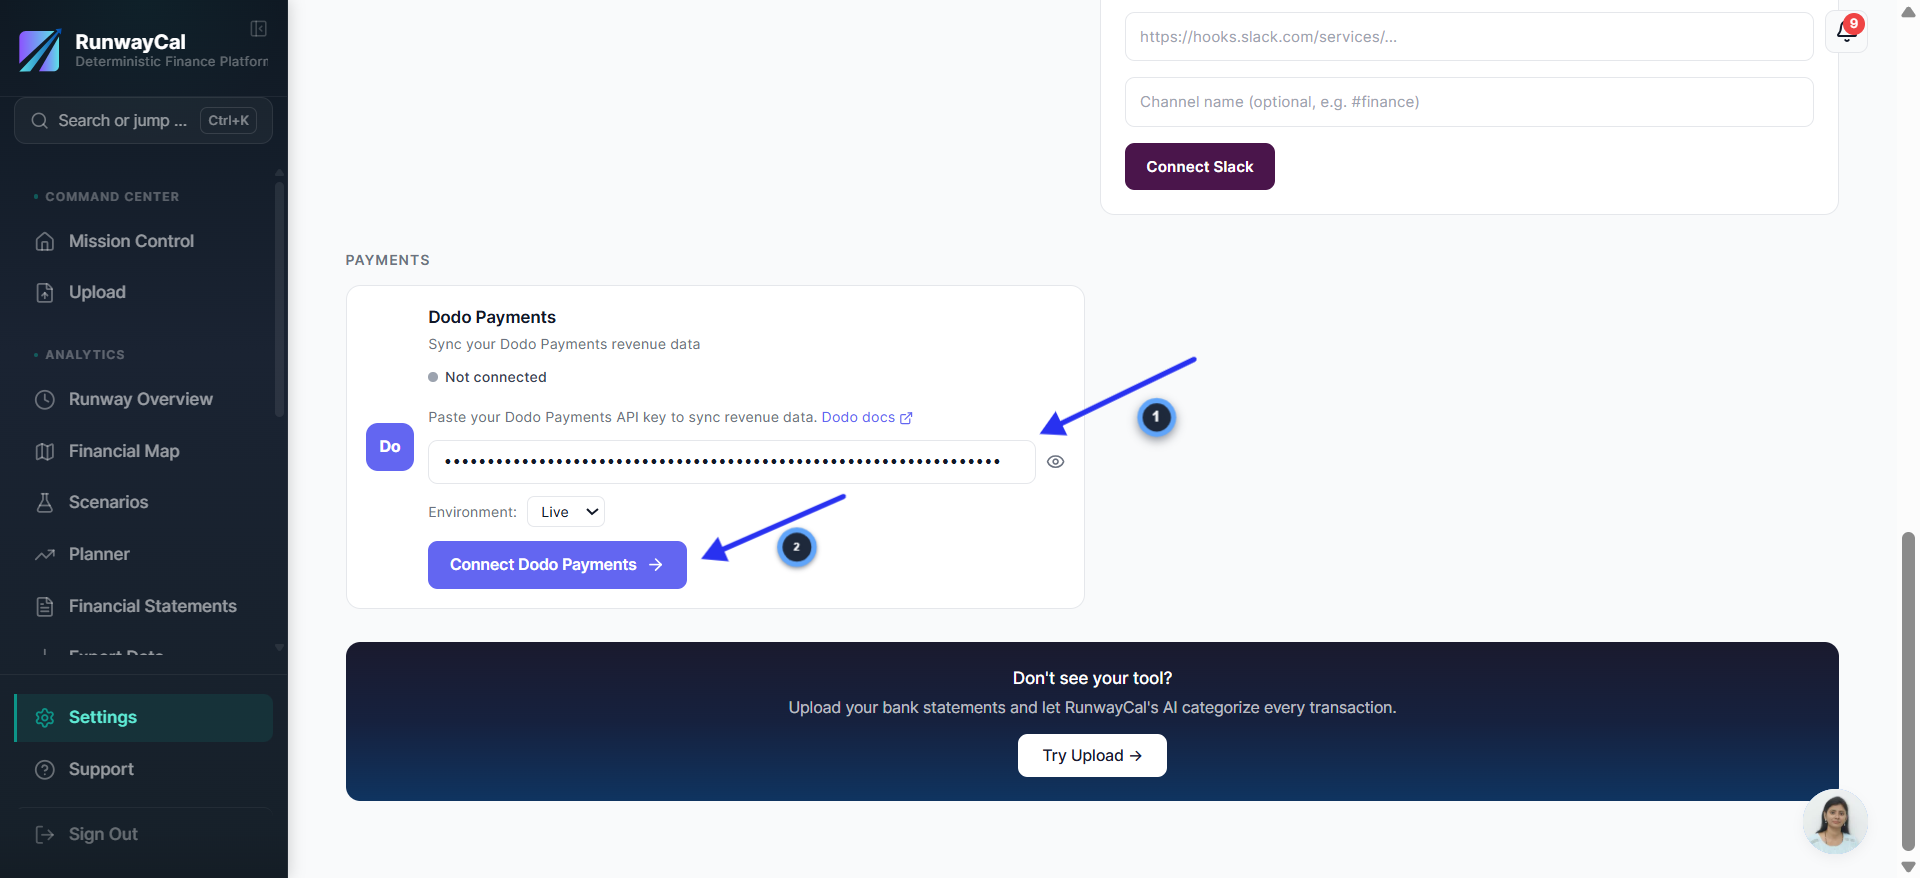
Paste the key in RunwayCal
- 1.In RunwayCal, go to Settings then Integrations tab
- 2.Scroll down to the "Payments" section
- 3.Find the Dodo Payments card
- 4.Paste your API key into the "Dodo API key" field
- 5.Set the Environment dropdown to "Live"
- 6.Click "Connect Dodo Payments"
5
Verify connection
- 1.The Dodo Payments card should show a green "Connected" badge
- 2."Live mode" will appear below the badge
- 3.Use "View Data" to load supported payment records for review
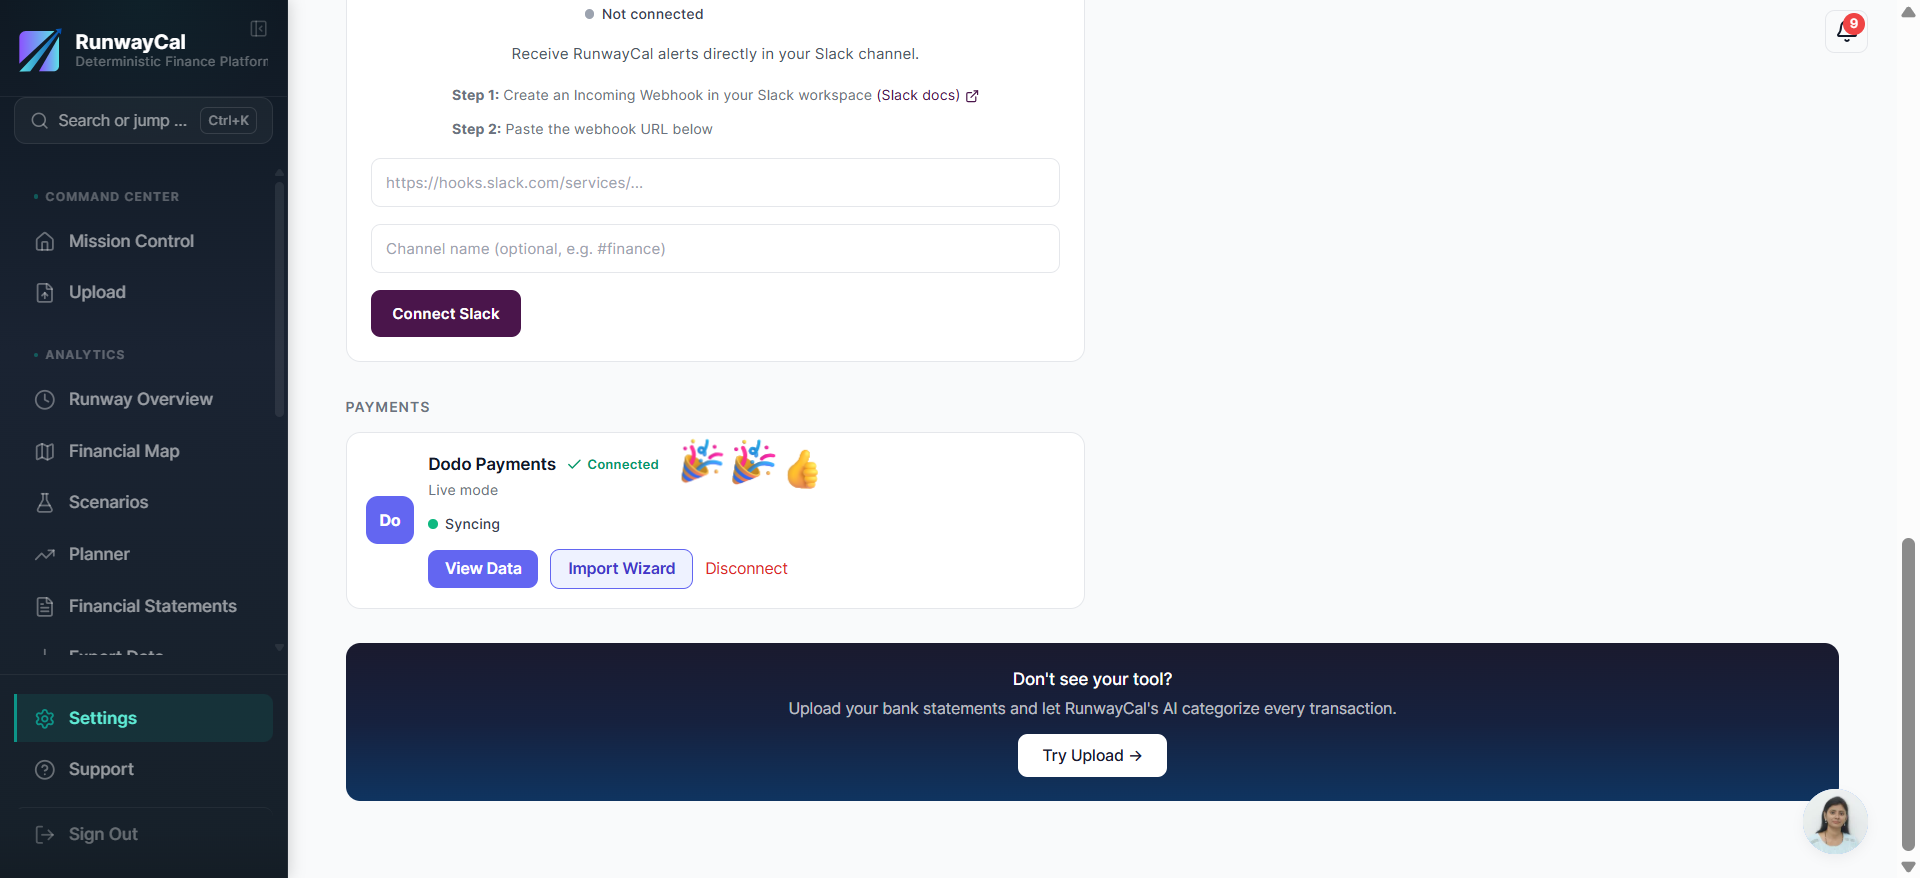
What you'll see after connecting
The Dodo Payments card shows a green "Connected" badge with the selected environment. Use "View Data" to inspect successful payments and approve or dismiss each suggestion.
Available connection data
| Data | Description |
|---|---|
| Payments | Transaction amounts, dates, status |
| Customer context | Customer details attached to supported payments |
Troubleshooting
Invalid API key
Make sure you copied the correct key from your Dodo dashboard. Live and test keys are different.
Test vs live data
Check the Environment dropdown. If set to "Test," you'll only see sandbox transactions.