

Deel
HR & Payroll
Review Deel people and supported payments before creating RunwayCal records.
What it does
Connect Deel with a read-only token to inspect supported people, contracts, and payment records. You choose which people become team members and which supported recurring payments become commitments.
Prerequisites
- A Deel Business account
- Admin access to generate API tokens
Step-by-step setup
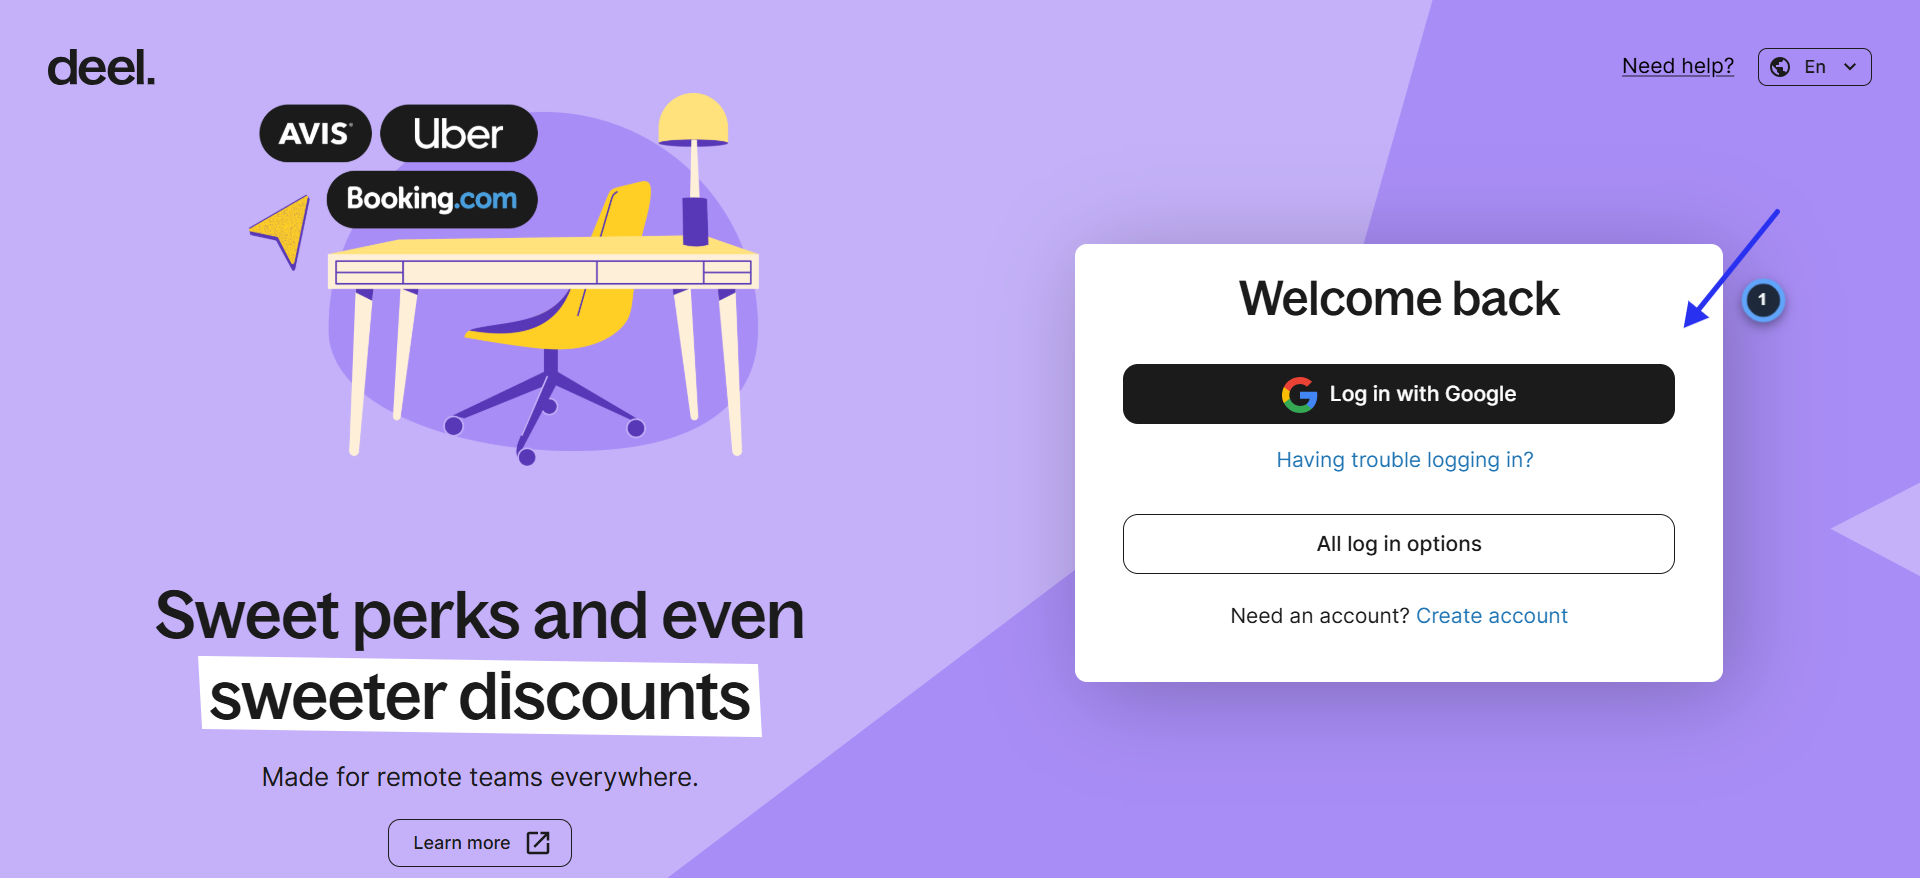
Log in to Deel
- 1.Go to app.deel.com
- 2.Click "Log in with Google" or enter your email and password
- 3.You need admin access to generate API tokens
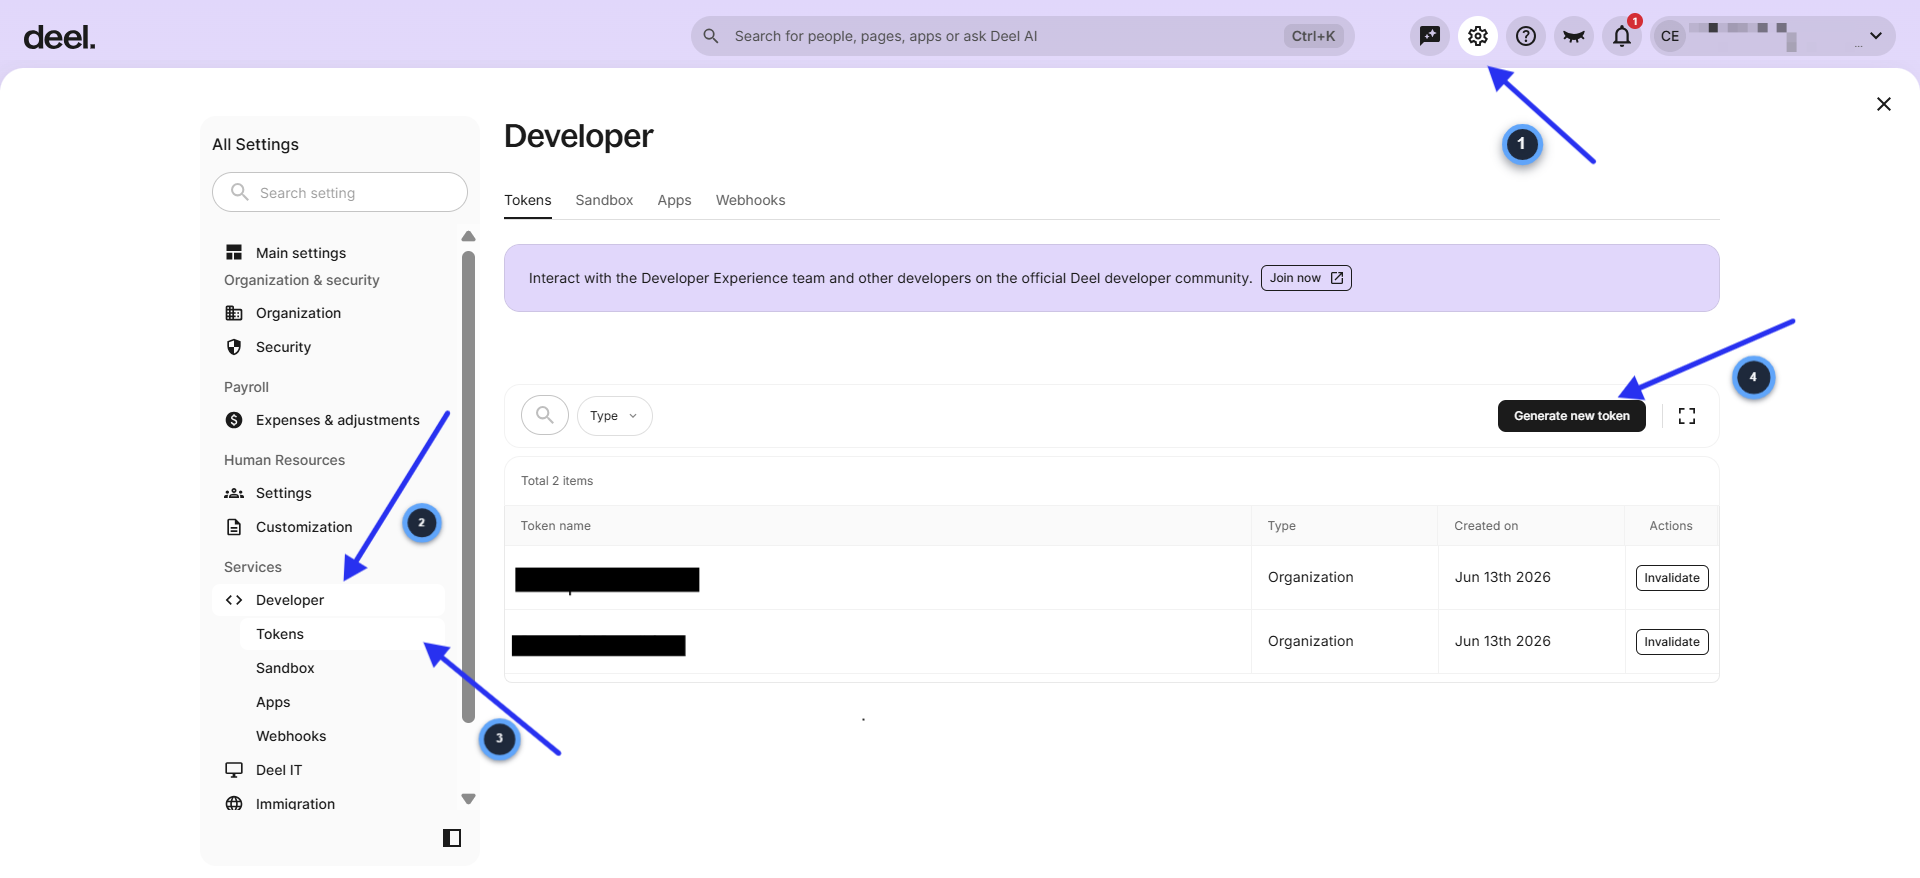
Navigate to Developer Tokens
- 1.Click the Settings gear icon in the top-right corner
- 2.In the left sidebar under "Services," click "Developer"
- 3.Click "Tokens" in the sub-navigation
- 4.Click "Generate new token"
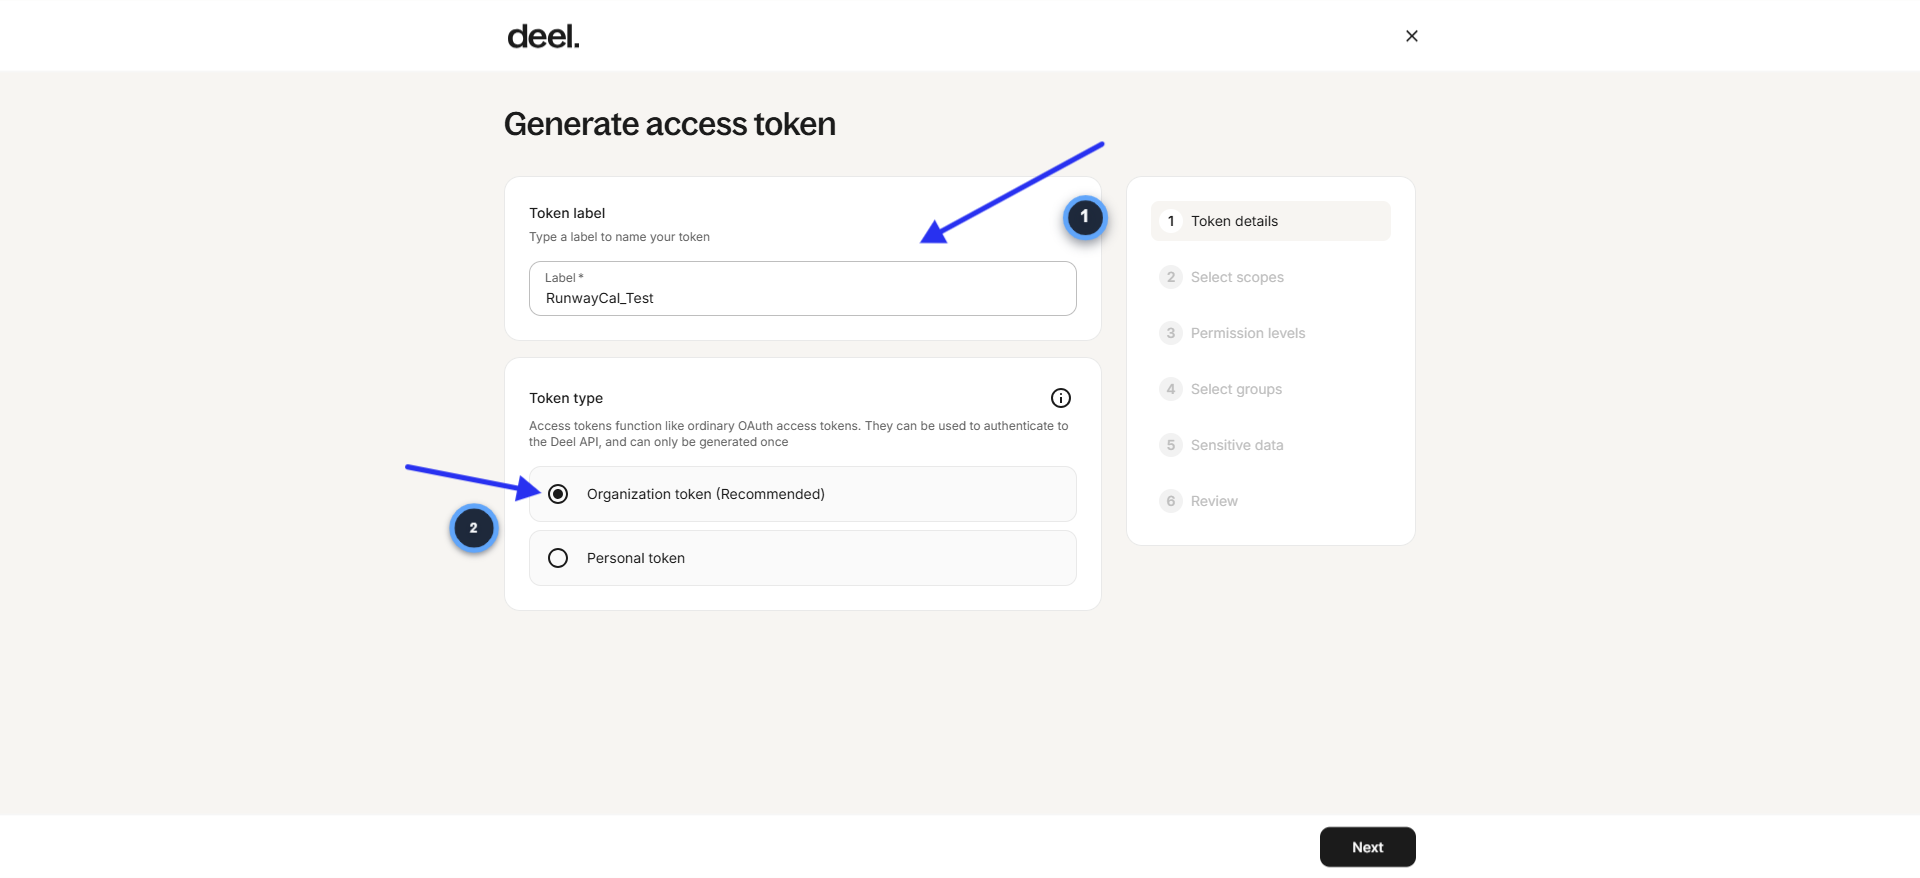
Enter token details
- 1.In the "Token label" field, type "RunwayCal"
- 2.Under "Token type," select "Organization token (Recommended)"
- 3.Click "Next"
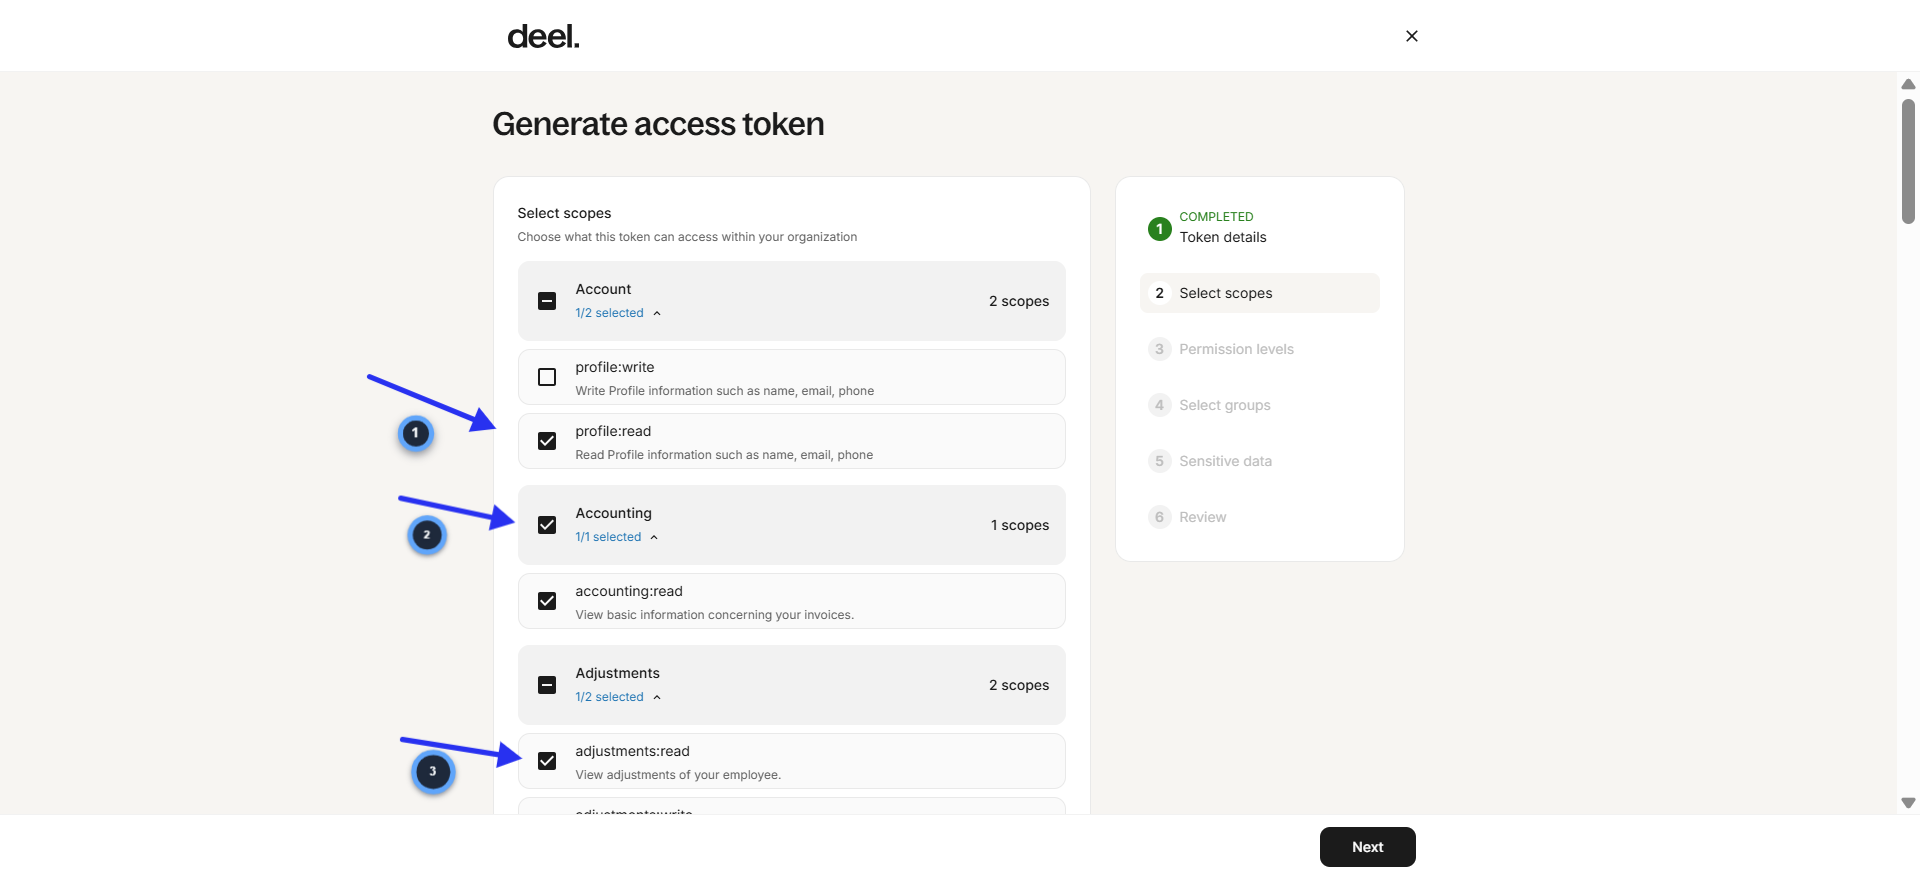
Select scopes
- 1.RunwayCal needs read-only access to these scopes. Check the "read" option for each:
- 2.Account: select "profile:read" (Read profile information)
- 3.Accounting: select "accounting:read" (View invoice information)
- 4.Adjustments: select "adjustments:read" (View employee adjustments)
- 5.Contracts: select "contracts:read"
- 6.Global Payroll: select "global-payroll:read"
- 7.Invoices: select "invoices:read"
- 8.Payments: select "payments:read"
- 9.Payslips: select "payslips:read"
- 10.People: select "people:read"
- 11.Do NOT select any "write" scopes. RunwayCal only reads data.
- 12.Click "Next"
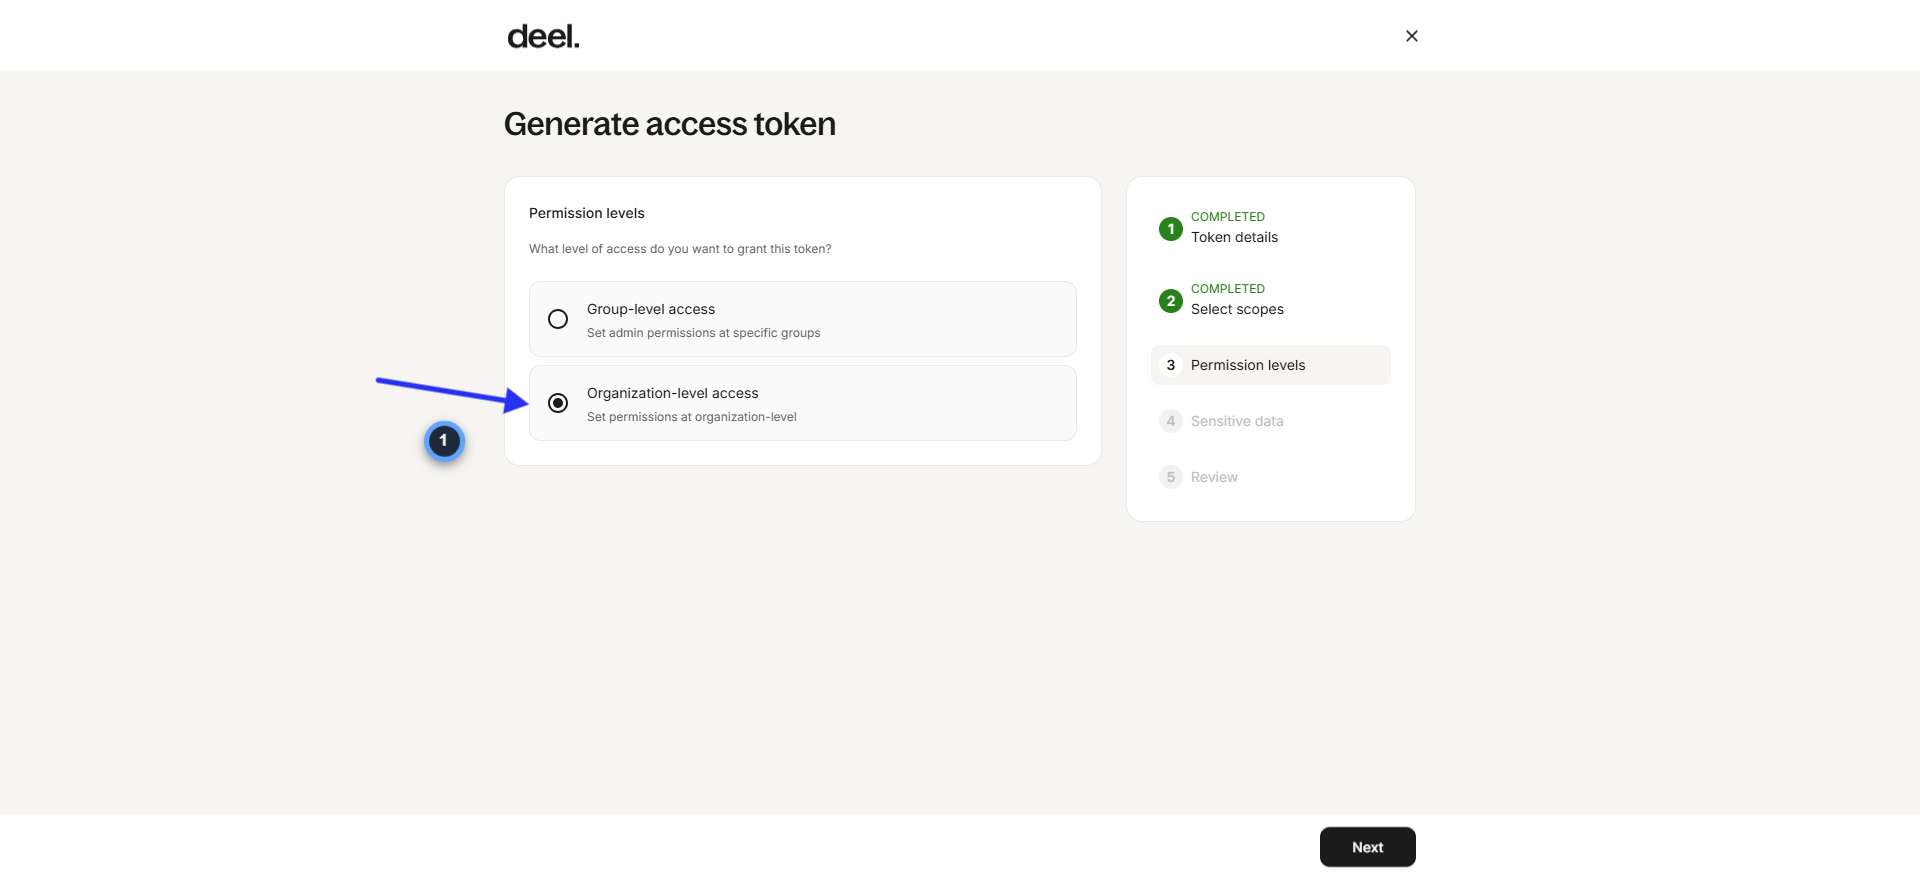
Set permission level
- 1.Select "Organization-level access" (not Group-level)
- 2.Click "Next"
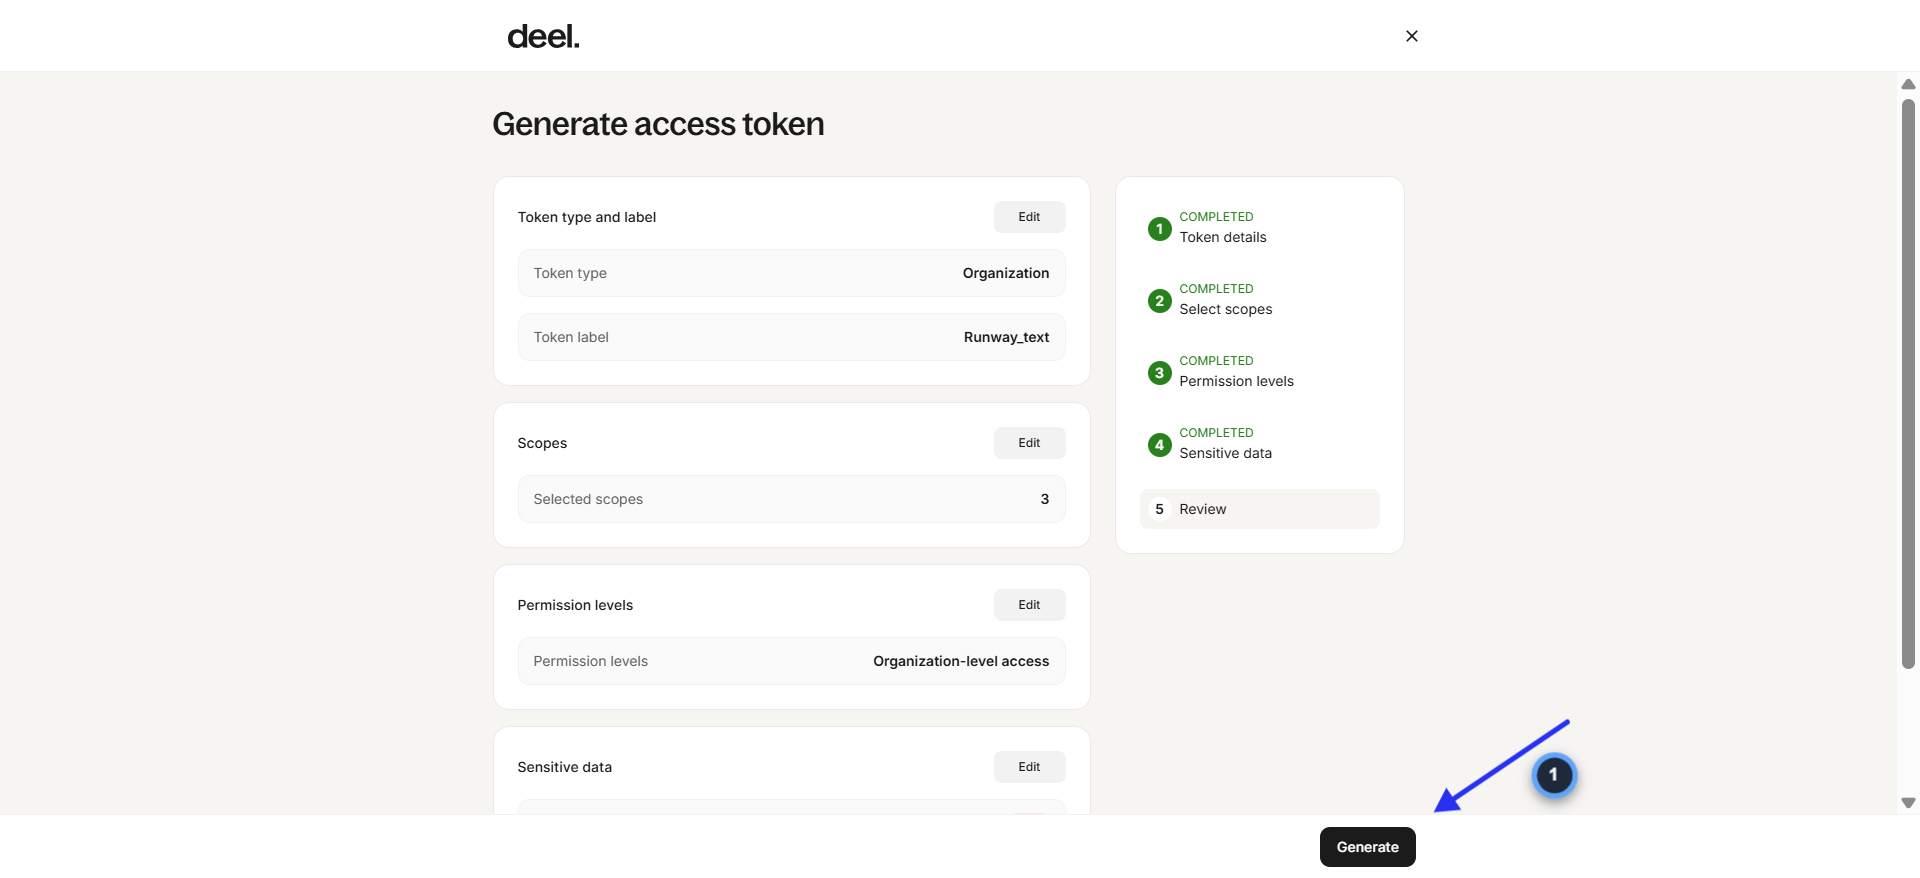
Review and generate
- 1.Review all settings: Token type (Organization), Token label (RunwayCal), Selected scopes (9 read-only), Permission levels (Organization-level access)
- 2.Under "Sensitive data," leave defaults (hide PII is optional)
- 3.Click "Generate"
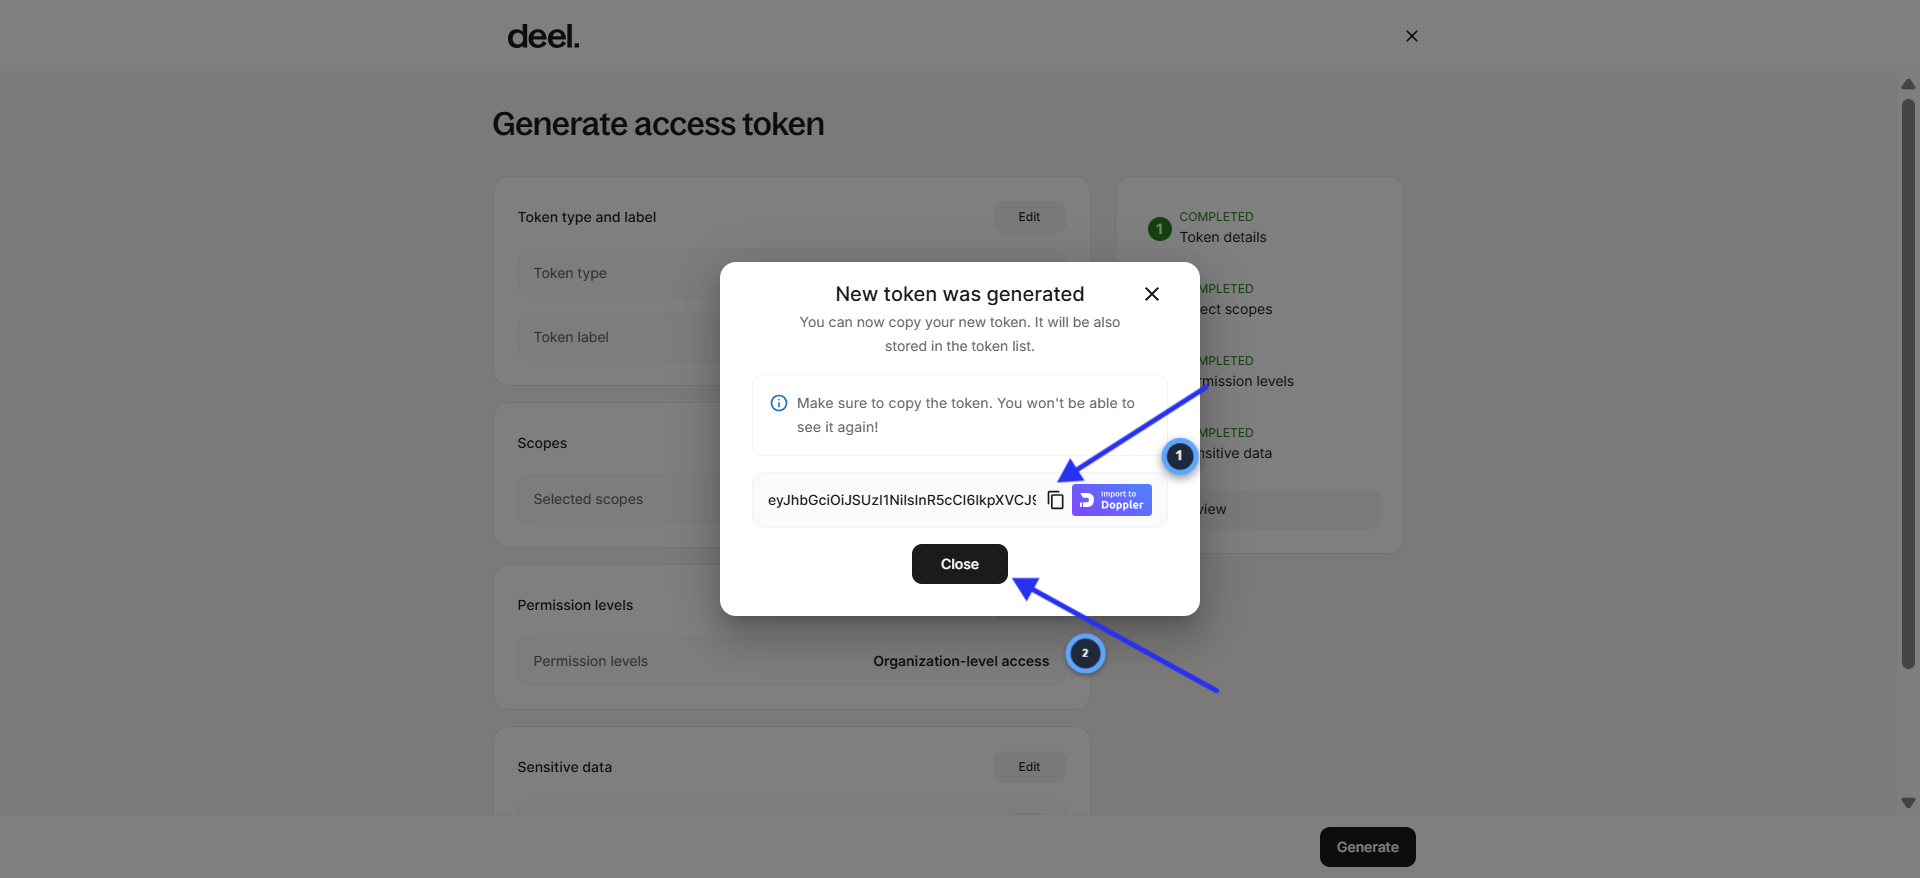
Copy the token
- 1.A modal appears: "New token was generated"
- 2.Click the copy icon next to the token (starts with "eyJ...")
- 3.Save this token somewhere safe. Deel only shows it once. You will not be able to see it again.
- 4.Click "Close"
Paste the token in RunwayCal and verify
- 1.In RunwayCal, go to Settings then Integrations tab
- 2.Find the Deel card under "HR & Payroll"
- 3.Paste the token into the "Deel API token" field
- 4.Click "Connect Deel"
- 5.The Deel card should show a green "Connected" badge
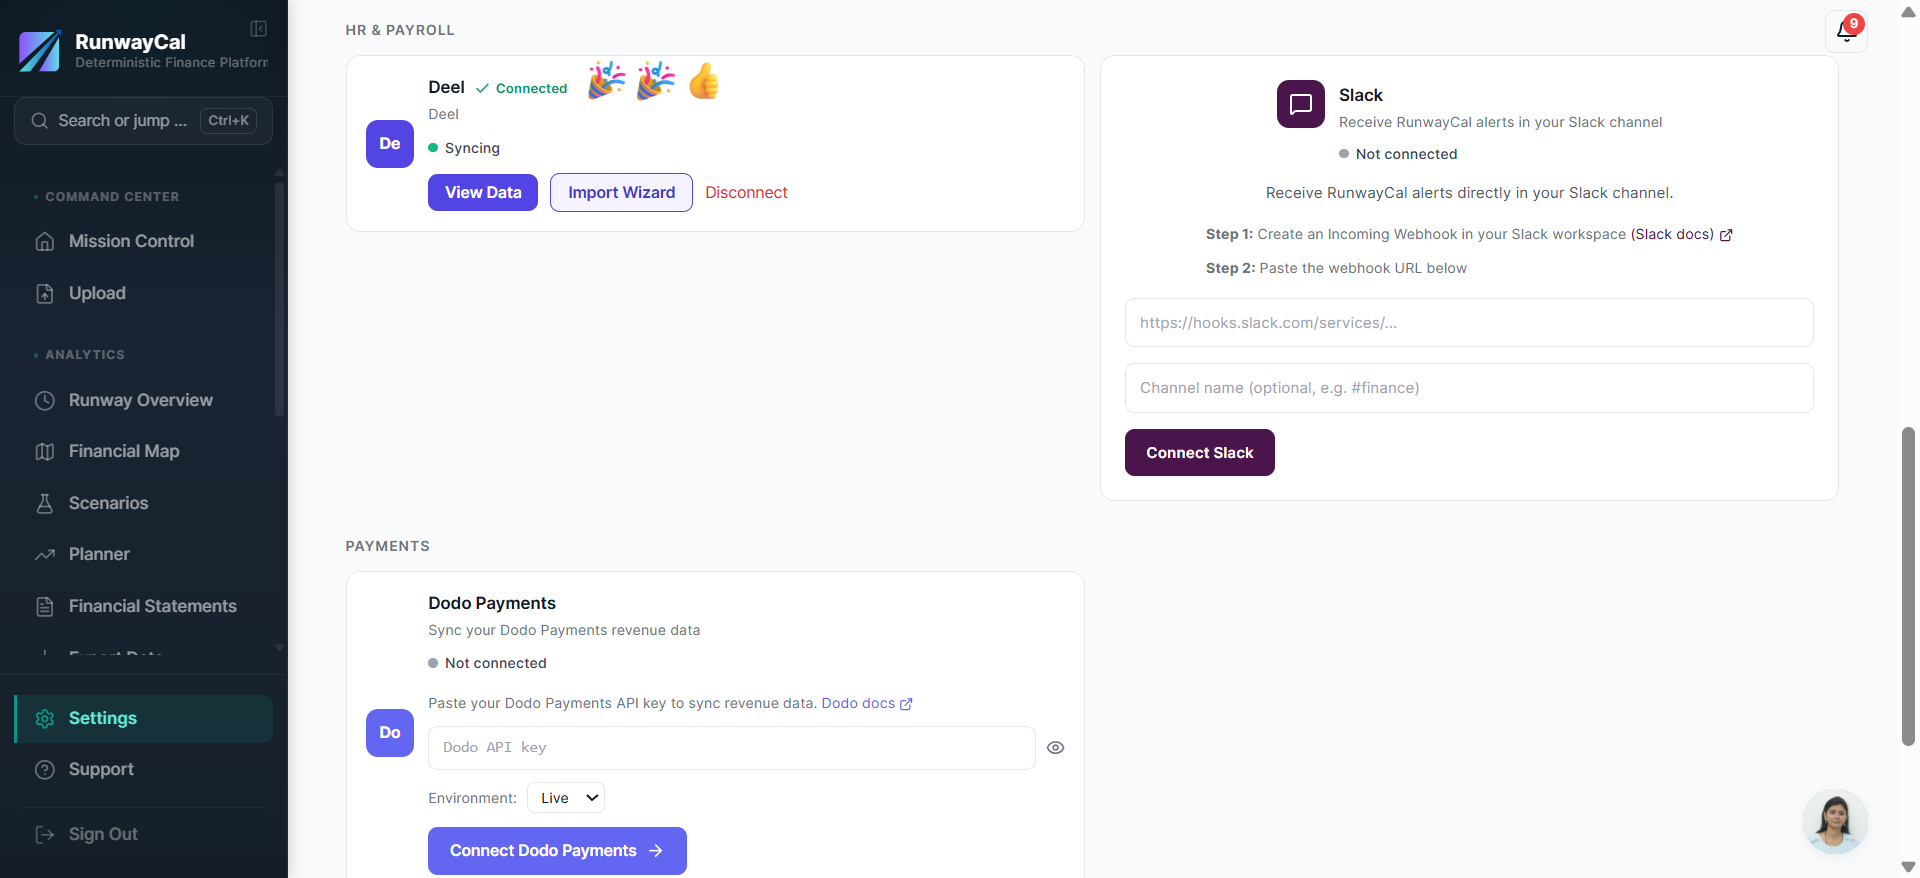
What you'll see after connecting
The Deel card shows a green "Connected" badge. Use "View Data" to inspect people and supported payment records, then approve the records that belong in RunwayCal.
Available connection data
| Data | Description |
|---|---|
| People | Employee and contractor names, roles, departments |
| Contracts | Contract type, start date, compensation |
| Payments | Payroll amounts, payment dates, currencies |
Troubleshooting
Invalid Deel API token
Check that you selected the correct scopes (people:read, contracts:read, payments:read) when generating the token. If unsure, generate a new token with the correct scopes.
Token expired
Deel tokens can expire. Generate a new token in Deel and paste it in RunwayCal.
No data showing
If your Deel account has no employees or contractors yet, the connection will succeed but show no records to review.